In this tutorial, we’re going to walk you through the steps to adjust the screen resolution of your Remote Desktop Program (RDP) session in Windows 10. This is a handy feature if you’re experiencing trouble reading text or viewing applications on a remote desktop because of a too high or too low resolution.
Step 1: Open the Remote Desktop Connection #
Firstly, click on the ‘Start’ button or press the ‘Windows’ key on your keyboard. In the search bar, type ‘Remote Desktop Connection’ and click on the app that appears in the results.
Step 2: Configure Remote Desktop Settings #
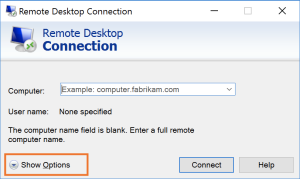
Now, in the ‘Remote Desktop Connection’ window, click on ‘Show Options’ located at the bottom left corner.

Step 3: Adjust the Display Settings #
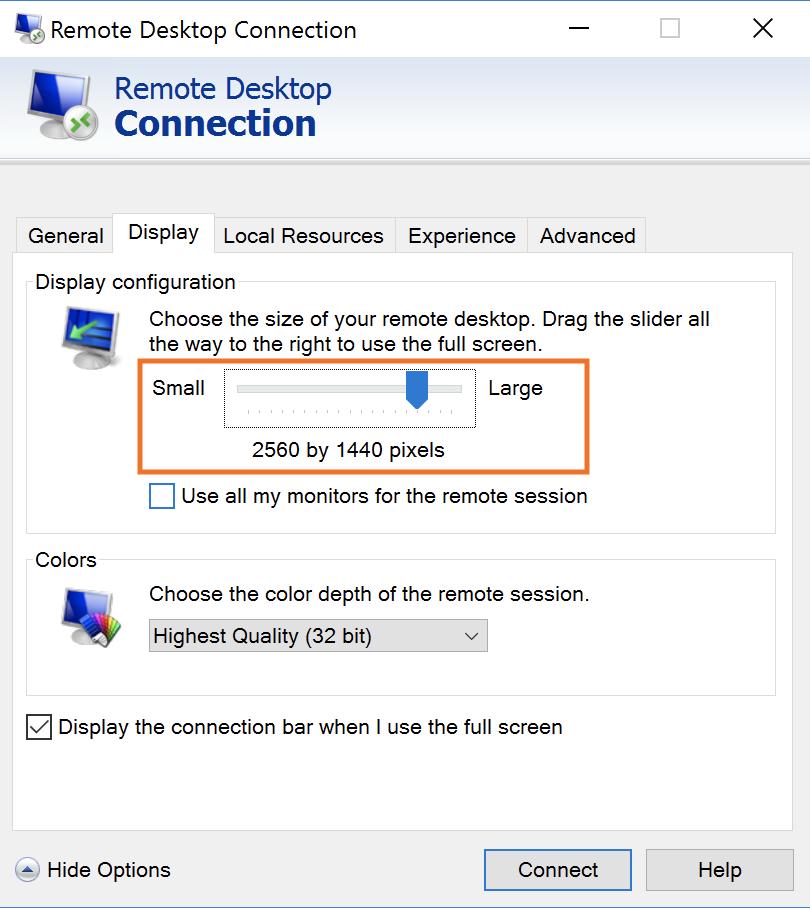
Click on the ‘Display’ tab, and you’ll find a slider under ‘Display configuration’. This slider allows you to adjust the resolution for your RDP session. Dragging the slider to the left decreases the resolution, while dragging it to the right increases it.

Remember, the higher the resolution, the smaller the items on the screen will appear, providing more space. On the other hand, a lower resolution will make everything look larger but provides less space.
Step 4: Apply the Settings #
Once you’re satisfied with the resolution, click on the ‘Connect’ button to start a new Remote Desktop session with the selected resolution.
Step 5: Validate Changes #
Once you are logged in to the Remote Desktop session, you can validate the resolution change by right-clicking on the desktop and selecting ‘Display settings’. Check if the resolution matches what you set in the RDP.
Please note that the resolution changes will only apply to the current session and will need to be adjusted every time you start a new session. If you want to make the changes permanent, you need to save the settings. You can do this by clicking ‘Save As’ in the ‘General’ tab of the ‘Options’ dialog before connecting.
Step 6: Adjust the Zoom Level Using the RDP Session Title Bar #
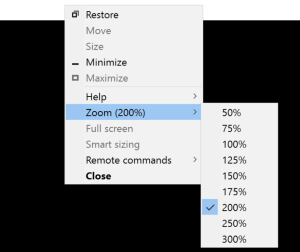
After you have connected with a lower resolution, you may want to utilize the Zoom feature to get a better view of the remote desktop. This feature is located directly on the Remote Desktop session title bar.
Access the menu via the right-click.

Remember to adjust the zoom level according to your preference for the best remote desktop experience.


